Showing posts with label diy. Show all posts

Monday, October 1, 2012

living room progress.

Untitled

this room has been (and still is) such a work in progress.  i haven't bothered to do too much in here since we moved in and i ended up dumping furniture that i couldn't fit/didn't want in other areas of the house.  here's the thing:  charlie and i aren't formal living room people.  when we were house hunting we were actively looking for houses that did not have formal living rooms or dining rooms because we knew we wouldn't end up using them.  in fact, before we started looking for houses i had promised charlie that if we ever ended up with a house with a formal dining room he could put a pool table in it instead.  but after looking at a lot of houses, we found this one that despite the formal living room met our needs.

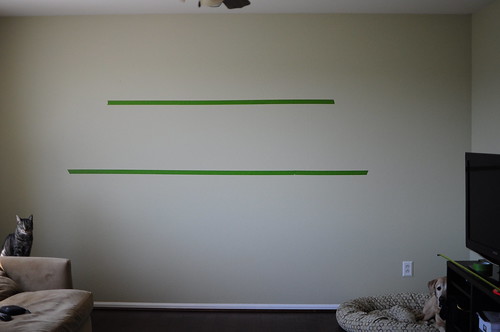
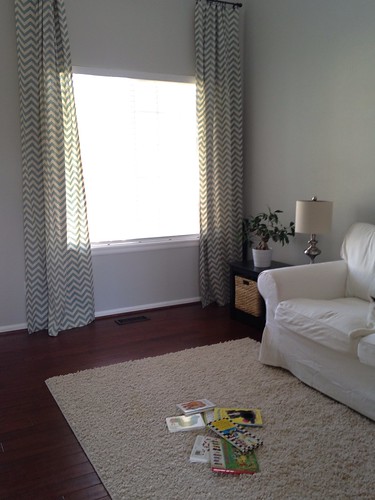
anyway, back to this room. the three pieces of furniture that it started out with were 2 bookshelves and a bench that held our shoes.  the bookshelves were definitely staying because i had no where else to put them.  i knew i wanted a white couch and we ended up with a loveseat because the room is actually pretty tiny and a couch would have looked pretty big and not left us with much room.  i also wanted  cheap couch because i wasn't thinking we would spend a lot of time in this room.  so ikea won out for this one.  and surprisingly i love it.  its super comfortable and we've ended up spending a lot of time on it reading books to avery.  i was originally thinking that i wanted a flatwoven rug in this room but after living in the room a while i realized i wanted something more cozy because with a baby we spend a lot of time sitting on the floor.  i was really in no hurry to get a rug but i found this at target and brought it home to try and charlie ended up loving it (this never happens) so it stayed.

the curtains were fabric from hobby lobby that i got for less than $30.  i used the ever-popular method of no-sew curtains to make them, which is so, so easy it makes me want to make new curtains for our bedroom.  i had no intention of hanging curtains this high  (they're over 100 inches long) but i didn't bother measuring when i was making them so they ended up super long.  i was planning on shortening them but charlie liked them long so i left them.  we still have pictures to hang and eventually i would love to get a chair in the room but for now i'm loving that it's actually a place that we spend time in and not just a room we stuck furniture in because it's the first thing you see when you walk in the house.  charlie informed me months ago that this is where our christmas tree is going to go so i'm sure we'll be spending even more time in here in a few months, reading christmas books and listening to christmas music (when charlie will let me start playing it, which isn't until after thanksgiving).  

Wednesday, September 12, 2012

diy picture ledges.

on thursday i talked about how i had contemplated scrapping the board and batten idea in our family room for a wall of picture ledges.  and then i talked myself down from that because i thought picture ledges with small children would be a disaster.  but on friday i started thinking more about it and on saturday charlie went to the gym and came back to this:

DSC_0309

they're crooked and i didn't even attempt to center them but at this point i was convinced that building some ledges would be a lot easier than board and batten and still satisfy my need for something substantial on that wall.  i should mention that charlie was never on board with the board and batten (ha!) idea, so he was pretty open to any alternative.  at first he wasn't thrilled about building these.  we're really not diy people, but when i told him we could buy something similar at ikea he said 'no, that would make us really lazy'.  so apparently in an effort not to be lazy we decided to build these.  

i looked at a few tutorials and sort of followed a mixture of the ones i read.  we used (2) 1x4 boards and (1) 1x2.  the bottom shelf is 8 feet long and the top shelf is 6 feet long.  we used wood glue to glue the 1x4s together and then drilled holes a foot apart along the board, and then drilled the screws in.  we then used the wood glue for the 1x2 (the lip) and used finishing nails to secure that to rest of the boards.  i put three coats of white, semi-gloss on the shelves.  i didn't prime (i know, i know) but the paint i used was paint and primer in one so i figure that sort of counts.  when we mounted them in the wall we just made sure we drilled directly into the studs so we could avoid drywall anchors.  i hate drywall anchors.  


DSC_0226

here's a close-up of the shelves.  i'd be lying if i said i wasn't impressed that we successfully built something.  i just threw some pictures up there and i'm sure they'll change as we figure out what we really want on them.  i'd actually really like to use them for family pictures.

DSC_0232

and here's what is looks like from a distance.  if we stay in this house long enough i can see a desk under those shelves for a computer.  one day i'll actually get a picture of the whole room, but until i switch the lens out on the camera that won't happen.  avery actually really likes them and it's nice to have pictures on the wall where i can point people out to her.  

and now, i'm ready for fall.  we still have a lot to do but for some reason those shelves make this room feel so much more like 'home'.  probably because we've lived here for 4 months and had yet to hang anything on them.  i also like that nothing's actually permanent so i can move things around as much as i want.